Google Search Console is a collection of tools to monitor, manage, improve your website health and make it Google-friendly. It enables you to resolve technical SEO issues and help you monitor your site’s performance thereby boosting your site’s organic traffic. In this post, we will be covering how to set up and install Google Search Console.
Page Contents:
How to Setup and Install Google Search Console?
Setting up Google Search Console
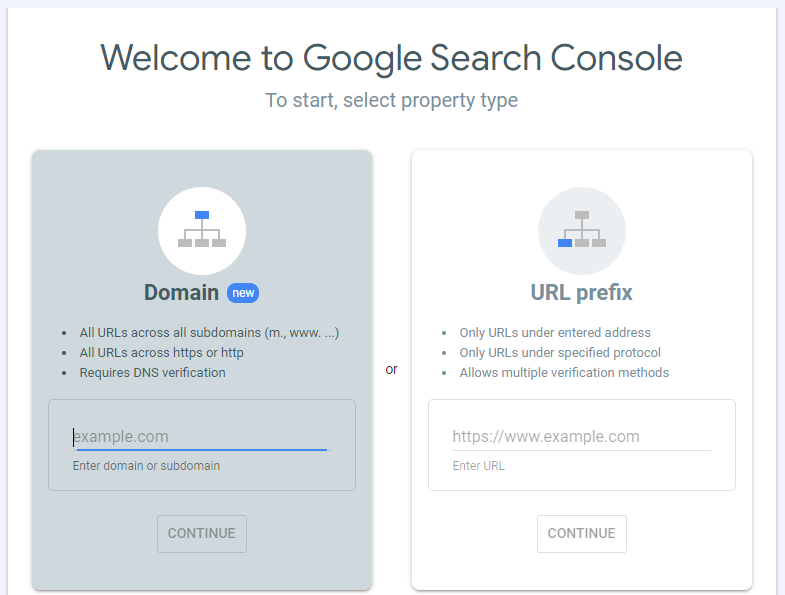
Visit Google Search Console Home page and click on Start. You will be asked to select the property type if you are signing in for the first time in Google Search Console. There will be two types- Domain and URL prefix.
A domain level property gives you a detailed view of your site performance and URLs on all subdomains including both HTTPS and HTTP. On the other hand, a URL prefix property, provides information relating to the URLs with a specified prefix. We recommend setting it as domain type.
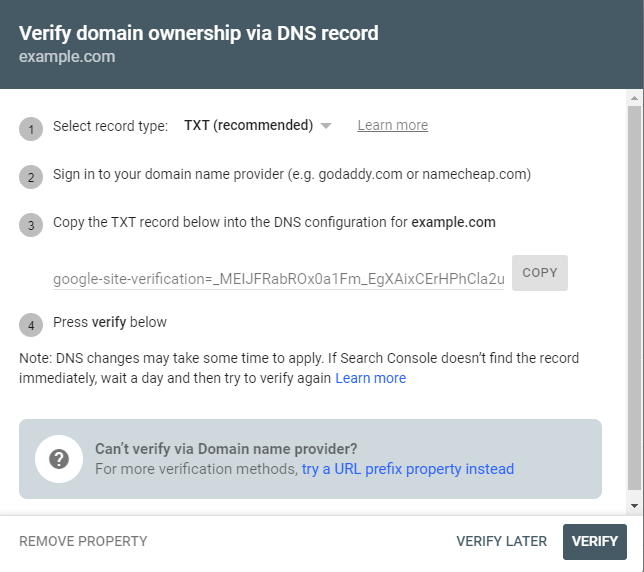
You also need to verify site ownership to prevent any kind of unauthorized access. You need to add the DNS record in your domain name provider. Once you have added your domain, your domain registrar will appear on the drop down menu list. Select it to start the authorization process. If your domain registrar does not appear in the list, you will have to copy the TXT record that is line of characters displayed next to copy button and then follow the required instructions for the domain name provider. It may happen that your verification is not processed instantly. In this case, you can check again after some time
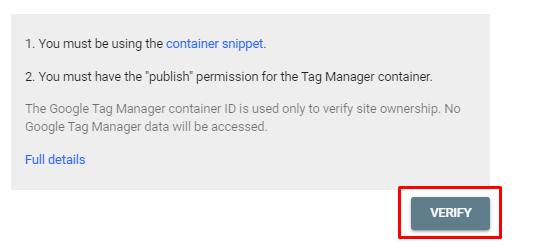
If you selected URL prefix property, then you need to verify the ownership of your website via HTML file upload, HTML tag, Google Analytics tracking code, Google Tag Manager container snippet, etc.
If you comfortable working with your site’s server, here’s how you verify using an HTML file:
- Download the file provided by Google.
- Access the root directory of your site.
- Upload the file
- Return to Search Console, and select “Verify”
Verifying site using HTML tag
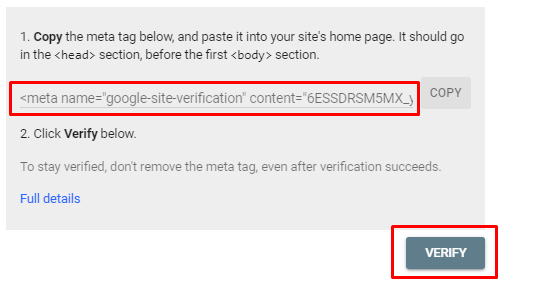
You will have to add meta tag to your site’s <head> section. You can use the plugin to add the header.
- Copy the tag.
- Log into your site’s WordPress admin in a new tab.
- Install the Insert Headers and Footers plugin on your site.
- Go to Settings>Insert Headers and Footers.
- Past the Search Console meta tag in the “Scripts in Header” field.
- Return to Search Console, and select “Verify”
Verifying site using Google analytics
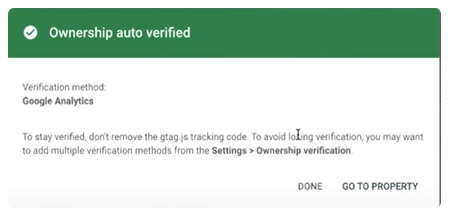
Open the Google Analytics verification box in Google Search Console and click on Verify. Similarly for verifying in the Google Tag Manager, open the Google Tag verification box and click “verify”.
Once the site ownership gets verified, you start accessing Google Search Console.
Once your website is verified, you need to submit a sitemap. If you don’t have a sitemap, you can use online tools such as XML sitemaps.
How to submit a Sitemap to Google Search Console?
A XML sitemap is a file that informs Google about the pages on your website. It enables search engines crawlers in scanning and indexing the webpages so that people can find it when they search for keywords online.
Creating Sitemaps for WordPress
Make use of the free plugin such as Yoast SEO or All in One SEO to create sitemaps for a WordPress site. Visit your admin dashboard and install and activate the plugin. If you are using Yoast SEO, click on Yoast SEO, then select General, then select features and click on XML Sitemap to on. You can now access your domain sitemap on “yourdomain.com/sitemap.xml” or “yourdomain.com/sitemap_index.xml.”
The All in One SEO plugin automatically generates the sitemap. Visit All in One SEO and click on Sitemaps. Then click on Open sitemap to view the sitemap.
Creating Sitemaps for Content Management systems such as Wix, Shopify,etc.
These sites will automatically create sitemaps. All you need to do is to visit at “yoursite.com/sitemap.xml”.
You can also generate sitemap using free online tools.
Submitting Sitemap to Google Search Console
- Visit Google Search Console
- Click on Sitemaps
- Enter the URL generated previously
- Next click Submit
Features in Google Search Console
Performance tab
This tab shows you what pages and keywords your website ranks for in Google SERPs. It will show you a list of queries, pages, countries or devices. You get to view how the rich snippets are performing in search results. You can filter the results using the option clicks, impressions, average CTR and average position.
- Clicks: This tab gives the information regarding the number of people who clicked on your site in Google search results.
- Impressions: These are the number of times your website appears for a particular search term in Google SERPs.
- Average CTR: CTR denotes click-through rate and it measures the number of times people have clicked on your web page from search results.
- Average position: It is a metric that provides information on where your site ranks on average in Google SERPs.
Google Search Console provides useful insights about how your site is performing. It helps to provides better search presence and improves search visibility on search results. Leverage this powerful tool to gather important data and information regarding your website’s performance and increase your rankings on SERPs.
